If you’re wondering how to estimate tiny house costs, wonder no more! It’s not as difficult as you may think!
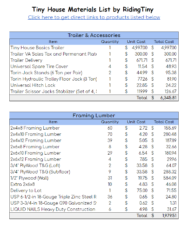
Get our FREE tiny house materials list to help estimate costs of your tiny home.
By entering your email address you agree to receive emails from Riding Tiny. We’ll respect your privacy and you can unsubscribe at any time.
How to Build a Tiny House Foundation
- By Sang Kim
- Updated:
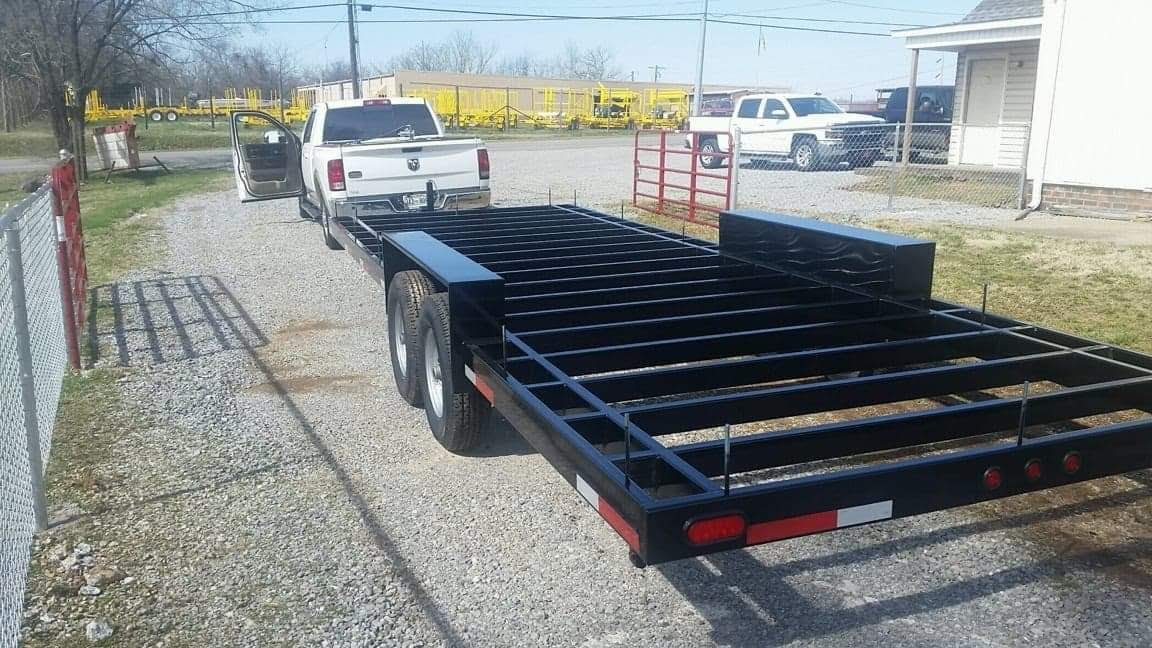
After leveling your tiny house trailer, it’s time to build the foundation where walls, roof, flooring, and virtually everything else will be built on.
In this guide, you will learn how to frame your foundation including subfloor, subfloor sheathing, and subfloor flashing.
Table of Contents
What is a Tiny House Subfloor?
The purpose of the subfloor is to provide structural support for finished flooring.
Tiny home trailers come with part of the subfloor already built into the trailer. The cross members act as joists and and the surface where subflooring sheathing will be installed.
This feature of a tiny home trailer eliminates the need for additional joist framing thereby reducing saving time and overall weight of a tiny home.
Install Subfloor Flashing
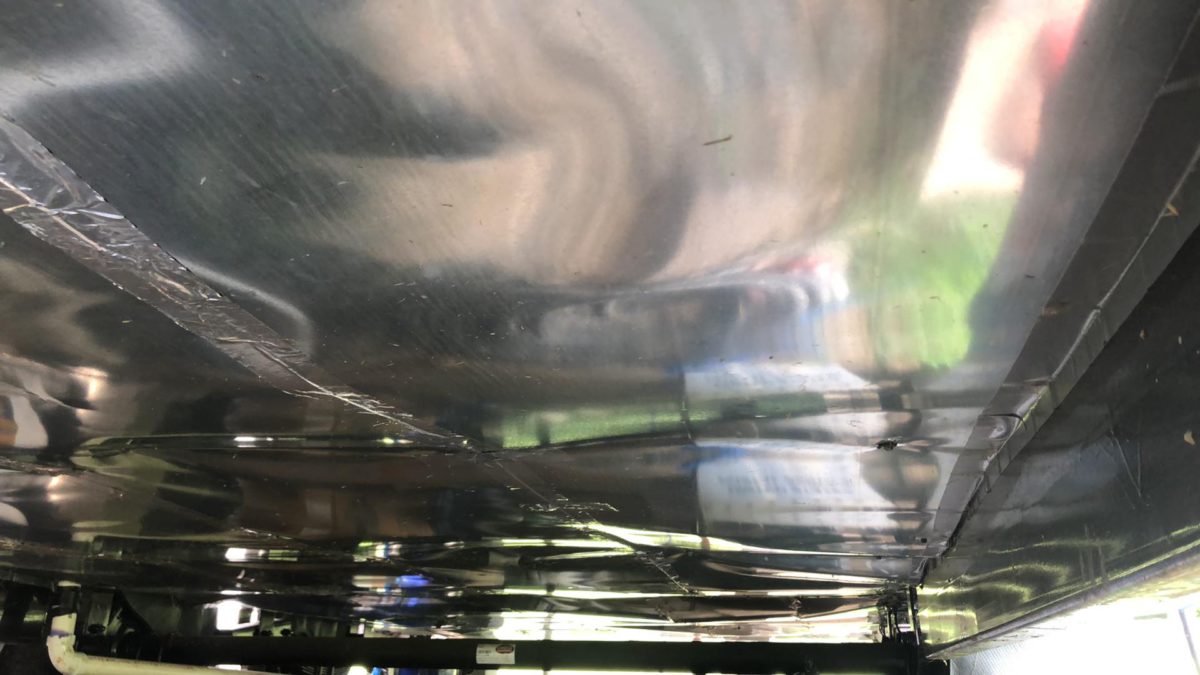
On the underside of your trailer or your subfloor, you need to attach aluminum or galvanized steel flashing.
Subfloor flashing serves two main purposes. It provides a barrier that prevents debris from entering your home while a tiny home is being towed, and it serves as a foundation on which subfloor insulation rests.
Some manufacturers provide pre-attached and pre-painted flashing as an option. If so, take this option!
I have many regrets not getting it professionally installed since it took me too long and spent too much money just to get a semi-decent result. Don’t let this be you!
Galvanized Steel Roll Flashing
If you click this link and make a purchase, we earn a commission at no additional cost to you.

If you don’t have a choice or want to install flashing yourself, you must use construction gloves and safety goggles to protect your hands and eyes from getting cut by metal flashing.
After cutting the flashing to the length of your trailer using sheet metal shear, use an impact driver to drive metal screws to fasten the flashing to the underside of the trailer.
Overlap two rows of flashing every 6 inches, and secure them both to the trailer frame using metal screws.
If you are attaching flashing to the wooden subfloor, simply roll and cut the flashing to the desired length. Then use metal-to-wood screws to hold them together.
Finally, use metal foil tape to seal up all seams and gaps to prevent insects and debris from getting into your subfloor.
Hot Tip – Use Irwin Bar Clamps to temporarily hold the flashing to the trailer as you fasten it to the trailer. This will speed up the installation process.
IRWIN QUICK-GRIP Bar Clamps
If you click this link and make a purchase, we earn a commission at no additional cost to you.

Insulate Subfloor
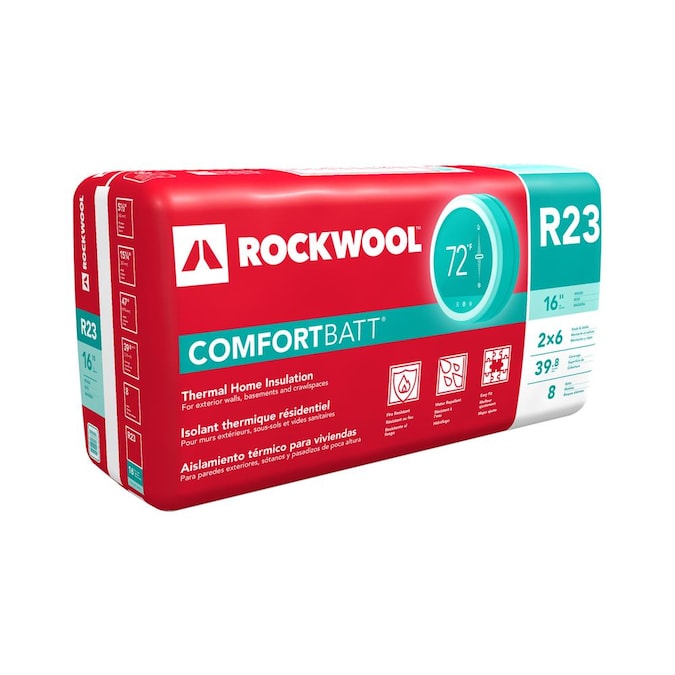
Effectiveness of insulation is measured by its insulation value or the R-value. Higher the R-value, thicker the insulation, better the thermal resistance.
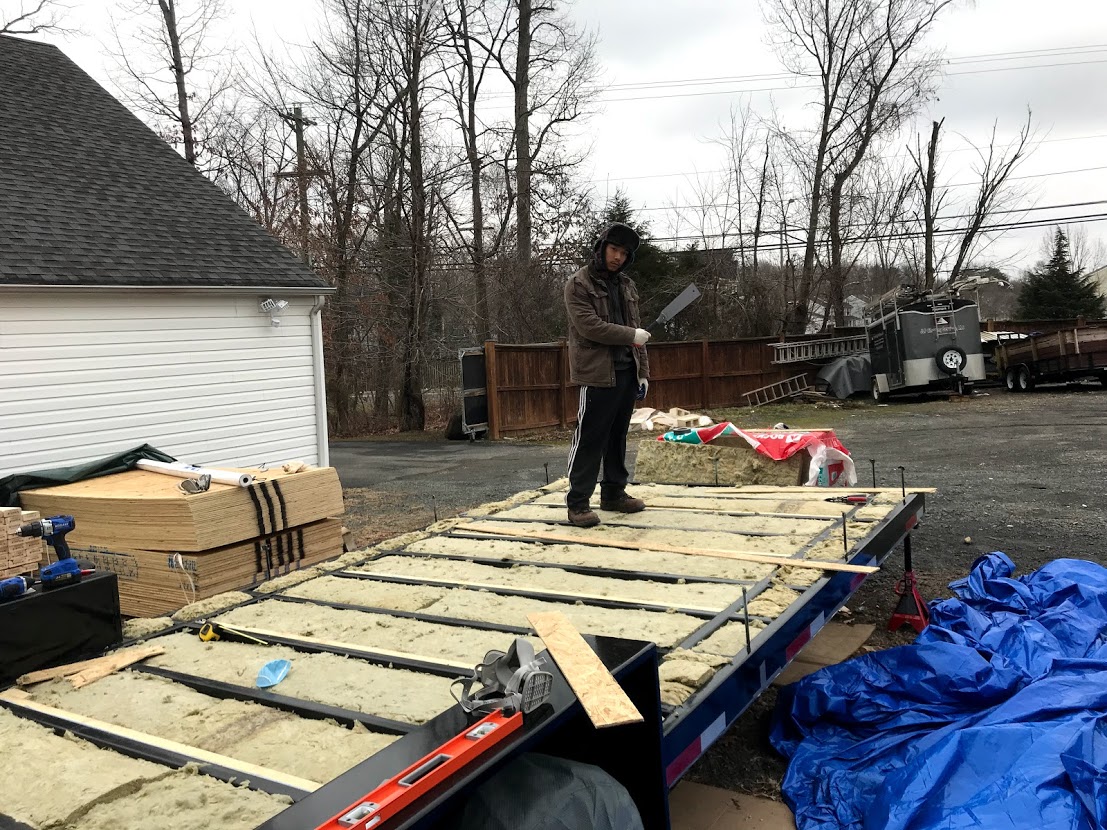
To install Rockwool insulation, simply cut the insulation to length using an insulation knife. You must cut the insulation 1″ thicker than the size of the space you are trying to fit.
For instance, if the width and length of the space you are trying to insulate is 14″ x 46″, you must cut your insulation to14.5″ x 46.5″ to allow insulation to fit snuggly into the space.
R-23 Rockwool insulation fit perfectly between each cross members of our trailer. We installed everything in a couple of hours.
ROCKWOOL R-23 Insulation
If you click this link and make a purchase, we earn a commission at no additional cost to you.
Install Subfloor Sheathing
Before you install the sheathing, you must prevent thermal bridging between the trailer deck and the subfloor sheathing.
Thermal bridging refers to the transfer of heat through the path of least resistance. In our case, we want to prevent heat loss through the floors during the winter time through thermal-bridging.
You can accomplish by installing an insulating gap between the trailer deck and the subfloor sheathing. Let us discuss how to install it.
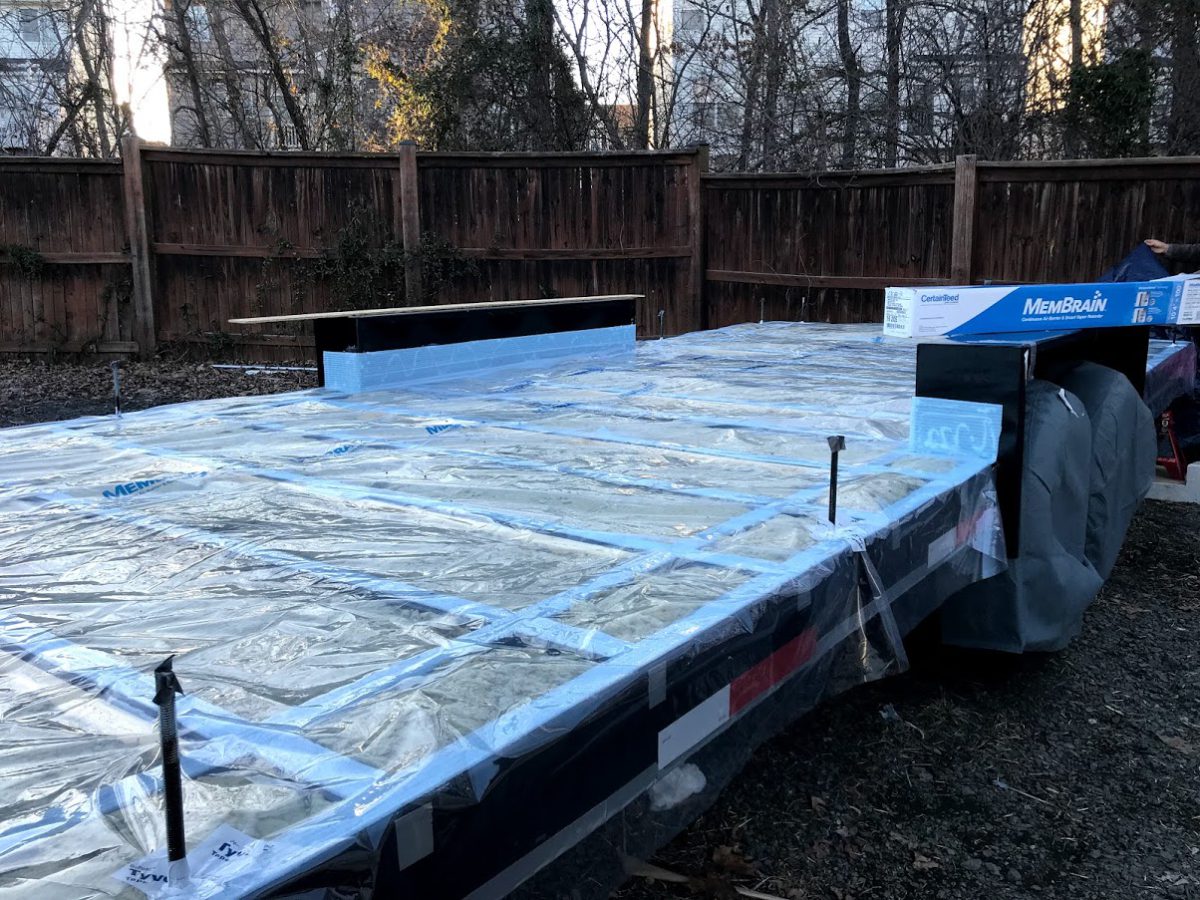
Sill Gasket and Vapor Barrier
Cut the insulating foam to the desired length. Apply a bead of foamboard glue to the trailer deck and around the fenders using a 10oz caulk gun. Adhere the foam to the trailer and let it dry.
Optional step: You can incorporate a vapor barrier like CertainTeed MemBrain into your subfloor to prevent excess moisture penetration from outside in.
If you decide to install, cut the vapor barrier to length. Leave additional 8 inches of vapor barrier on all four sides (these extra flaps will be folded back up once sheathing is installed). Tape up all seams and holes using a Tyvek Sheathing Tape.
Subfloor Sheathing
Cut 3/4″ 4′ x 8′ T&G plywood or OSB to the desired length. Use as many whole pieces of OSB as possible to reduce waste and to save money.
Leave 1/8″ gap whenever two plywood meets using 1/8″ gap spacers. Or, you can use an edge of a Speed Square to introduce 1/8″ gap.
Drive wood-to-metal screws through the plywood, insulating foam, and trailer metal frame to fasten everything together.
Screws should be spaced 12 inches apart around the inner edges and 6 inches apart on the outer edges.
Here is a great visual overview of installing subfloor sheathing. Since we will be fastening the sheathing to trailer frame, we must use wood-to-metal screws instead of regular screws.
Frequently Ased Questions
We recommend using 5.5″ or thicker Rockwool insulation for insulating your tiny house floor. You only need a pair of gloves and a hand saw to properly install it.
Subfloor constructed by 2×6 studs or beams are sufficient assuming your tiny home is going to air conditioned. If you want to have higher insulation done on your subfloor, either go with spray foam insulation (more expensive) or increase the thickness of your subfloor.
Short answer, No. Older houses have been built without vapor barriers and continue to function well to this day. You want to install vapor barrier if you want an air-tight home for more efficient home. However, you may not need it at all depending on where you plan to live. If you anticipate that you may be moving your tiny home between different climate zones, having a vapor barrier in the wrong side may do you more bad than good.
Sure! OSB is a cheaper option than plywood. We chose plywood because that was what was available to us at the time. Regular homes use OSB sheathing all over so go ahead!
No. Your subfloor will bend and sag over time if you go any thinner than 3/4″. Also, 3/4″ or thicker subfloor is required for construction of new homes.
Get our FREE tiny house materials list to help estimate costs of your tiny home.
By entering your email address you agree to receive emails from Riding Tiny. We’ll respect your privacy and you can unsubscribe at any time.

Sang Kim is the founder of Riding Tiny® and has been active in the tiny house scene since 2018. Since then, his mission is to help people plan and build their dream tiny homes. And each year, he continues to help more people on the path to simple living and financial independence. Follow Sang's journey @ridingtiny
Sang Kim is the founder of Riding Tiny® and has been active in the tiny house scene since 2018. Since then, his mission is to help people plan and build their dream tiny homes. And each year, he continues to help more people on the path to simple living and financial independence. Follow Sang's journey @ridingtiny
Recommended Reading
How does a composting toilet work in a tiny house? And how do you decide which one is the best? In this post, we got all the answers for you.
Taking time to plan and design your tiny home can save you big bucks on your build, plus let you get to customize however you please.
A stable foundation ensures a strong tiny home. Let’s learn what goes into making a sturdy tiny foundation!
Have you wondered how much it costs to live in a tiny home, per month? Well I go over the numbers and spill all the juice. Check it out!
Do you need help choosing the best tiny home trailer for your tiny home? We’re here to help you decide on your tiny home trailer.